Tag Archives: sandbox seeding

Illustration representing the four classes of data classification.

Data Classification in SOX-Compliant ALM

Updated on September 29, 2023.

How to Use Data Classification for a SOX-Compliant ALM Process in Salesforce

Illustration representing the four classes of data classification.

Robust data classification is a fundamental element of a data governance policy. It’s also critical to ensuring SOX-compliant Salesforce application lifecycle management (ALM). By classifying financial data correctly and protecting its integrity, you can avoid violating SOX regulations.

Let’s examine this topic more closely by explaining the role of data classification in a SOX-compliant Salesforce ALM process. We discuss the risks of using financial data during testing and how to avoid them. We also highlight the potential impact of Salesforce changes on financial data.

Robust Data Classification Protects Against Noncompliance

When you manage your Salesforce data and deployments effectively, they result in the changes you want. However, when your data classification isn’t properly managed, it can potentially expose sensitive financial information. And that could result in a violation of SOX regulations. 

Incorrect Data Classification in Practice

A data classification file with three types of data.

In practice, if financially-impactful data isn’t identified as sensitive, it could accidentally be exposed to unauthorized users during the release process.

For example, let’s say a developer is testing a new feature with sensitive financial data. However, they don’t know they should mask or obfuscate that data. In a situation like this, they could unintentionally expose it to unauthorized individuals. Someone could simply walk by their laptop and see the data on their screen. Similarly, if the developer’s laptop is compromised, the data could be stolen, which places the company at risk.

At the same time, consider what would happen in this scenario: You’re working on a change that will impact financial data. However, you’re not aware that the data in question is financial data. When an error slips into the code, you don’t see it, and neither does anyone else on the team—so you promote the change to your production instance. This could easily result in a glitch that snowballs from a minor bug into a huge issue that impacts the integrity of your financial data. 

These scenarios are both realistic examples of how incorrect data classification can lead to SOX violations.

Consequences of Incorrect Data Classification in ALM

If you don’t consider data classification during the Salesforce application lifecycle management process, the fallout can be serious. And if your company is public, it could face severe consequences stemming from a violation of SOX regulations. 

Noncompliance with the Sarbanes-Oxley Act of 2002 (SOX) can put your CEO and CFO at risk of fines and imprisonment. Your organization can also be subject to fines. Other potential consequences include delisting from the stock exchange and civil penalties.

However, it doesn’t stop there. If an audit calls the integrity of your financial reporting into question, you’ll almost certainly lose the trust of your customers and investors. And once that trust is lost, it can be incredibly challenging to win it back.

The Role of Data Classification in SOX-Compliant ALM

In the Salesforce change management process, you might have to use sensitive data for testing to ensure a change provides the functionality you want. When situations like this occur, you need to leverage data classification to prevent financial data from being exposed.

Let’s take a closer look.

The Risk of Using Financially-Impacting Data for Testing

In the release process, you generally won’t want to use any sensitive data for testing. However, sometimes you need to use it to test how a specific type of data responds to a change. And when it comes to financial data, you need to make sure it’s adequately protected during the testing stage.

Of course, you can always use dummy data. However,  if the data isn’t as close to the real data in your production environment as possible, it will impact the quality of your changes. So you need a way to provide your developers with test data you replicate from production without giving them access to sensitive information.

How to Protect Sensitive Data During Testing

Fortunately, there are ways to protect the integrity of your financial data during testing. They include data masking, data redaction, and data obfuscation, as well as using 1-click scratch org automation.

Data Masking, Data Redaction, and Data Obfuscation

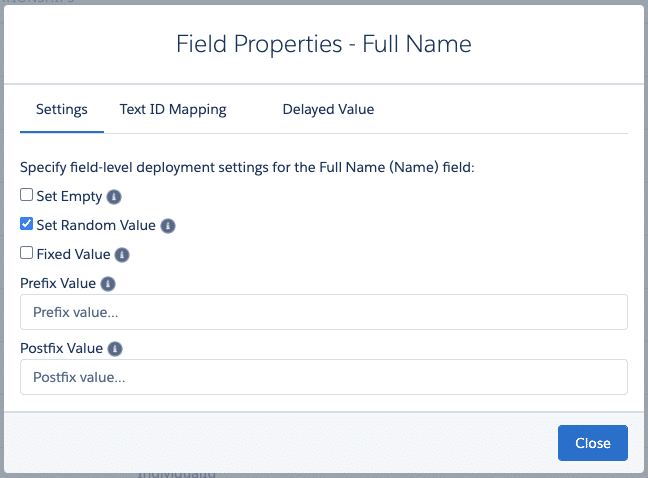
To protect sensitive data during the testing stage, use data masking, data redaction, or data obfuscation when you populate a sandbox with test data. In other words, when preparing the test environment, you select the financial data but mask, adjust, or scramble it so the developer can’t read the real information.

For example, when you set up a test environment, you could mask the dollar amounts of closed deals so your developer can’t see that information. You could also redact the data and replace numbers with asterisks or a dummy number like 0. Or you could obfuscate the data by scrambling the numbers completely. 

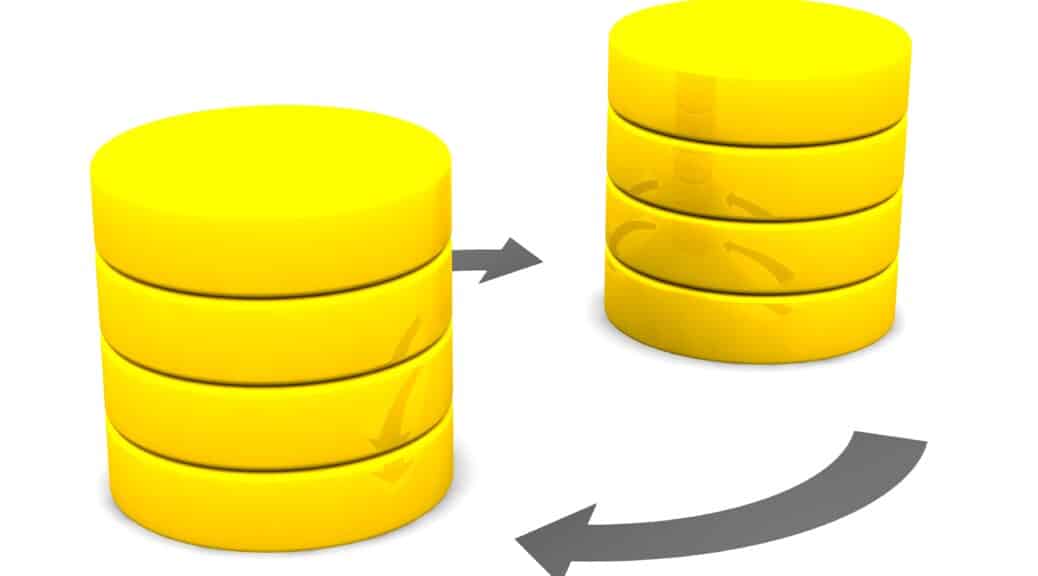
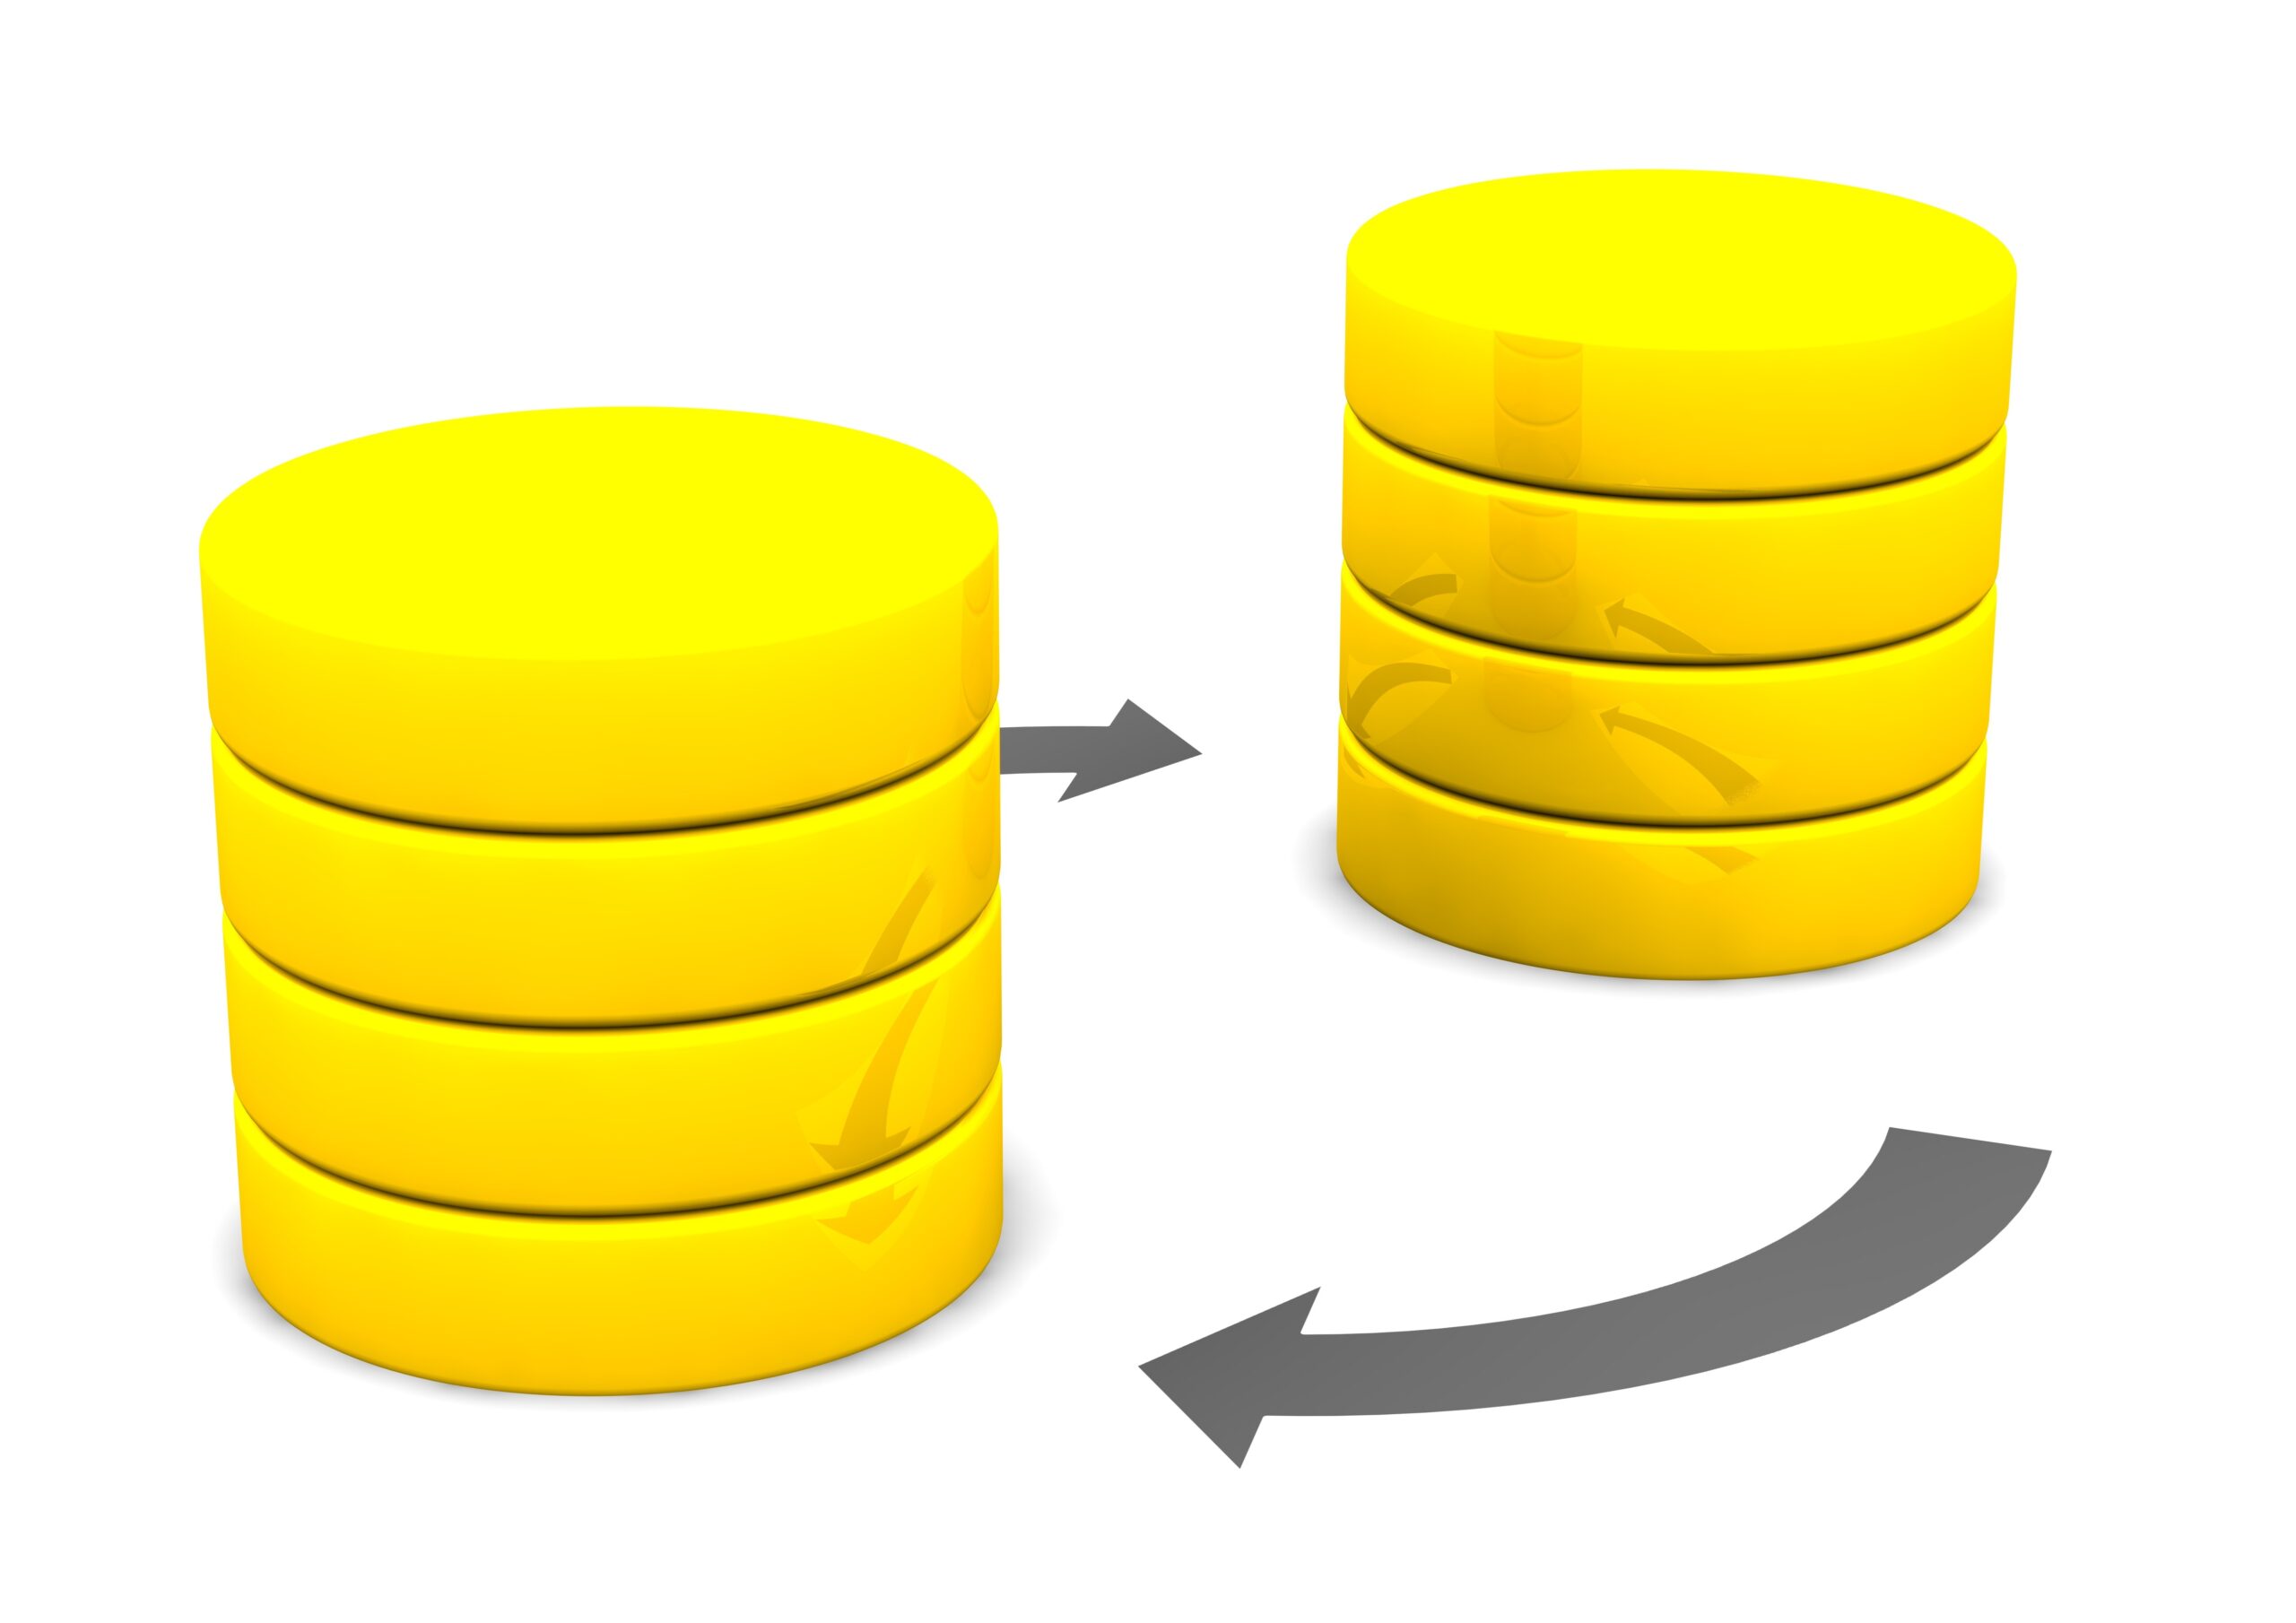
One of the easiest, fastest, and most secure ways to do this is with Prodly’s sandbox seeding feature. This lets you instantly replicate data from production into up to five environments in one go—while masking or redacting the data with a single click.

Another benefit of Prodly is that it masks or obfuscates the data before it goes into the development environment. That means the team member preparing the environment can be authorized to see it, but the developer who’ll be working in the org will never see it. This adds yet another layer of security to your data protection

1-Click Scratch Org Automation

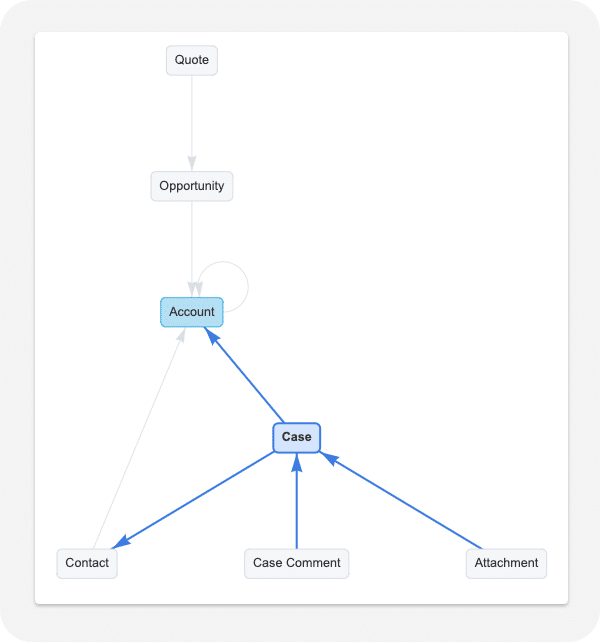
You can also spin up a scratch org with precisely the right metadata and data for your purposes. Prodly provides a 1-click scratch org feature that lets you do this effortlessly. Just like with sandbox seeding, you can choose which data to replicate from production into your environment. And you can protect sensitive financial data with data masking or data redaction simply by selecting the option you want.

Data Classification Is a Continuous Learning Cycle

As we’ve seen, data classification plays a crucial role in Salesforce ALM—particularly when it comes to ensuring SOX compliance. When you effectively and consistently classify data and cautiously manage changes, you can ensure a secure and compliant ALM process. After all, in today’s data-driven business world, ensuring data integrity isn’t just a goal—it’s a necessity.

FAQs

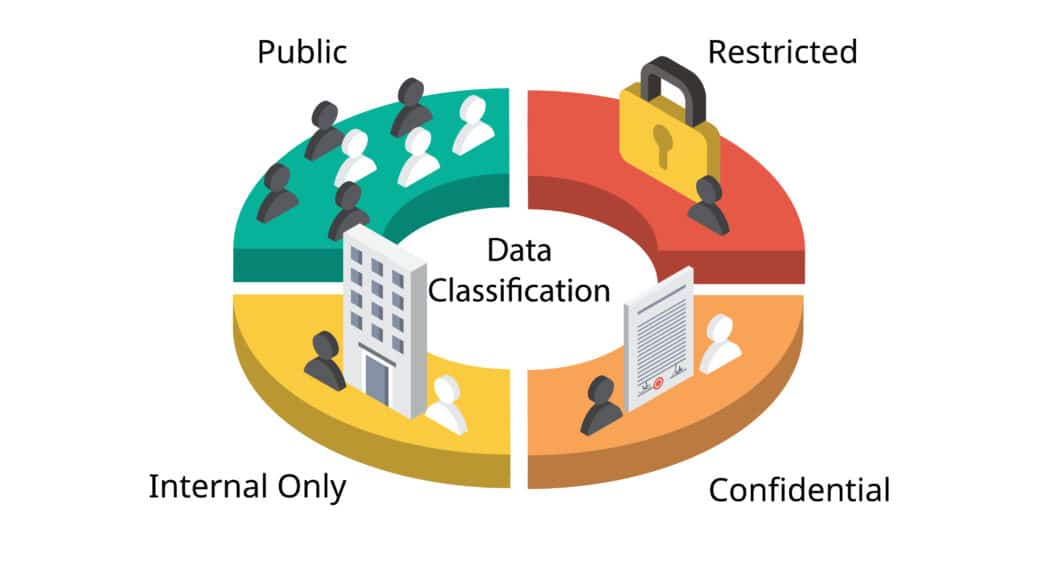
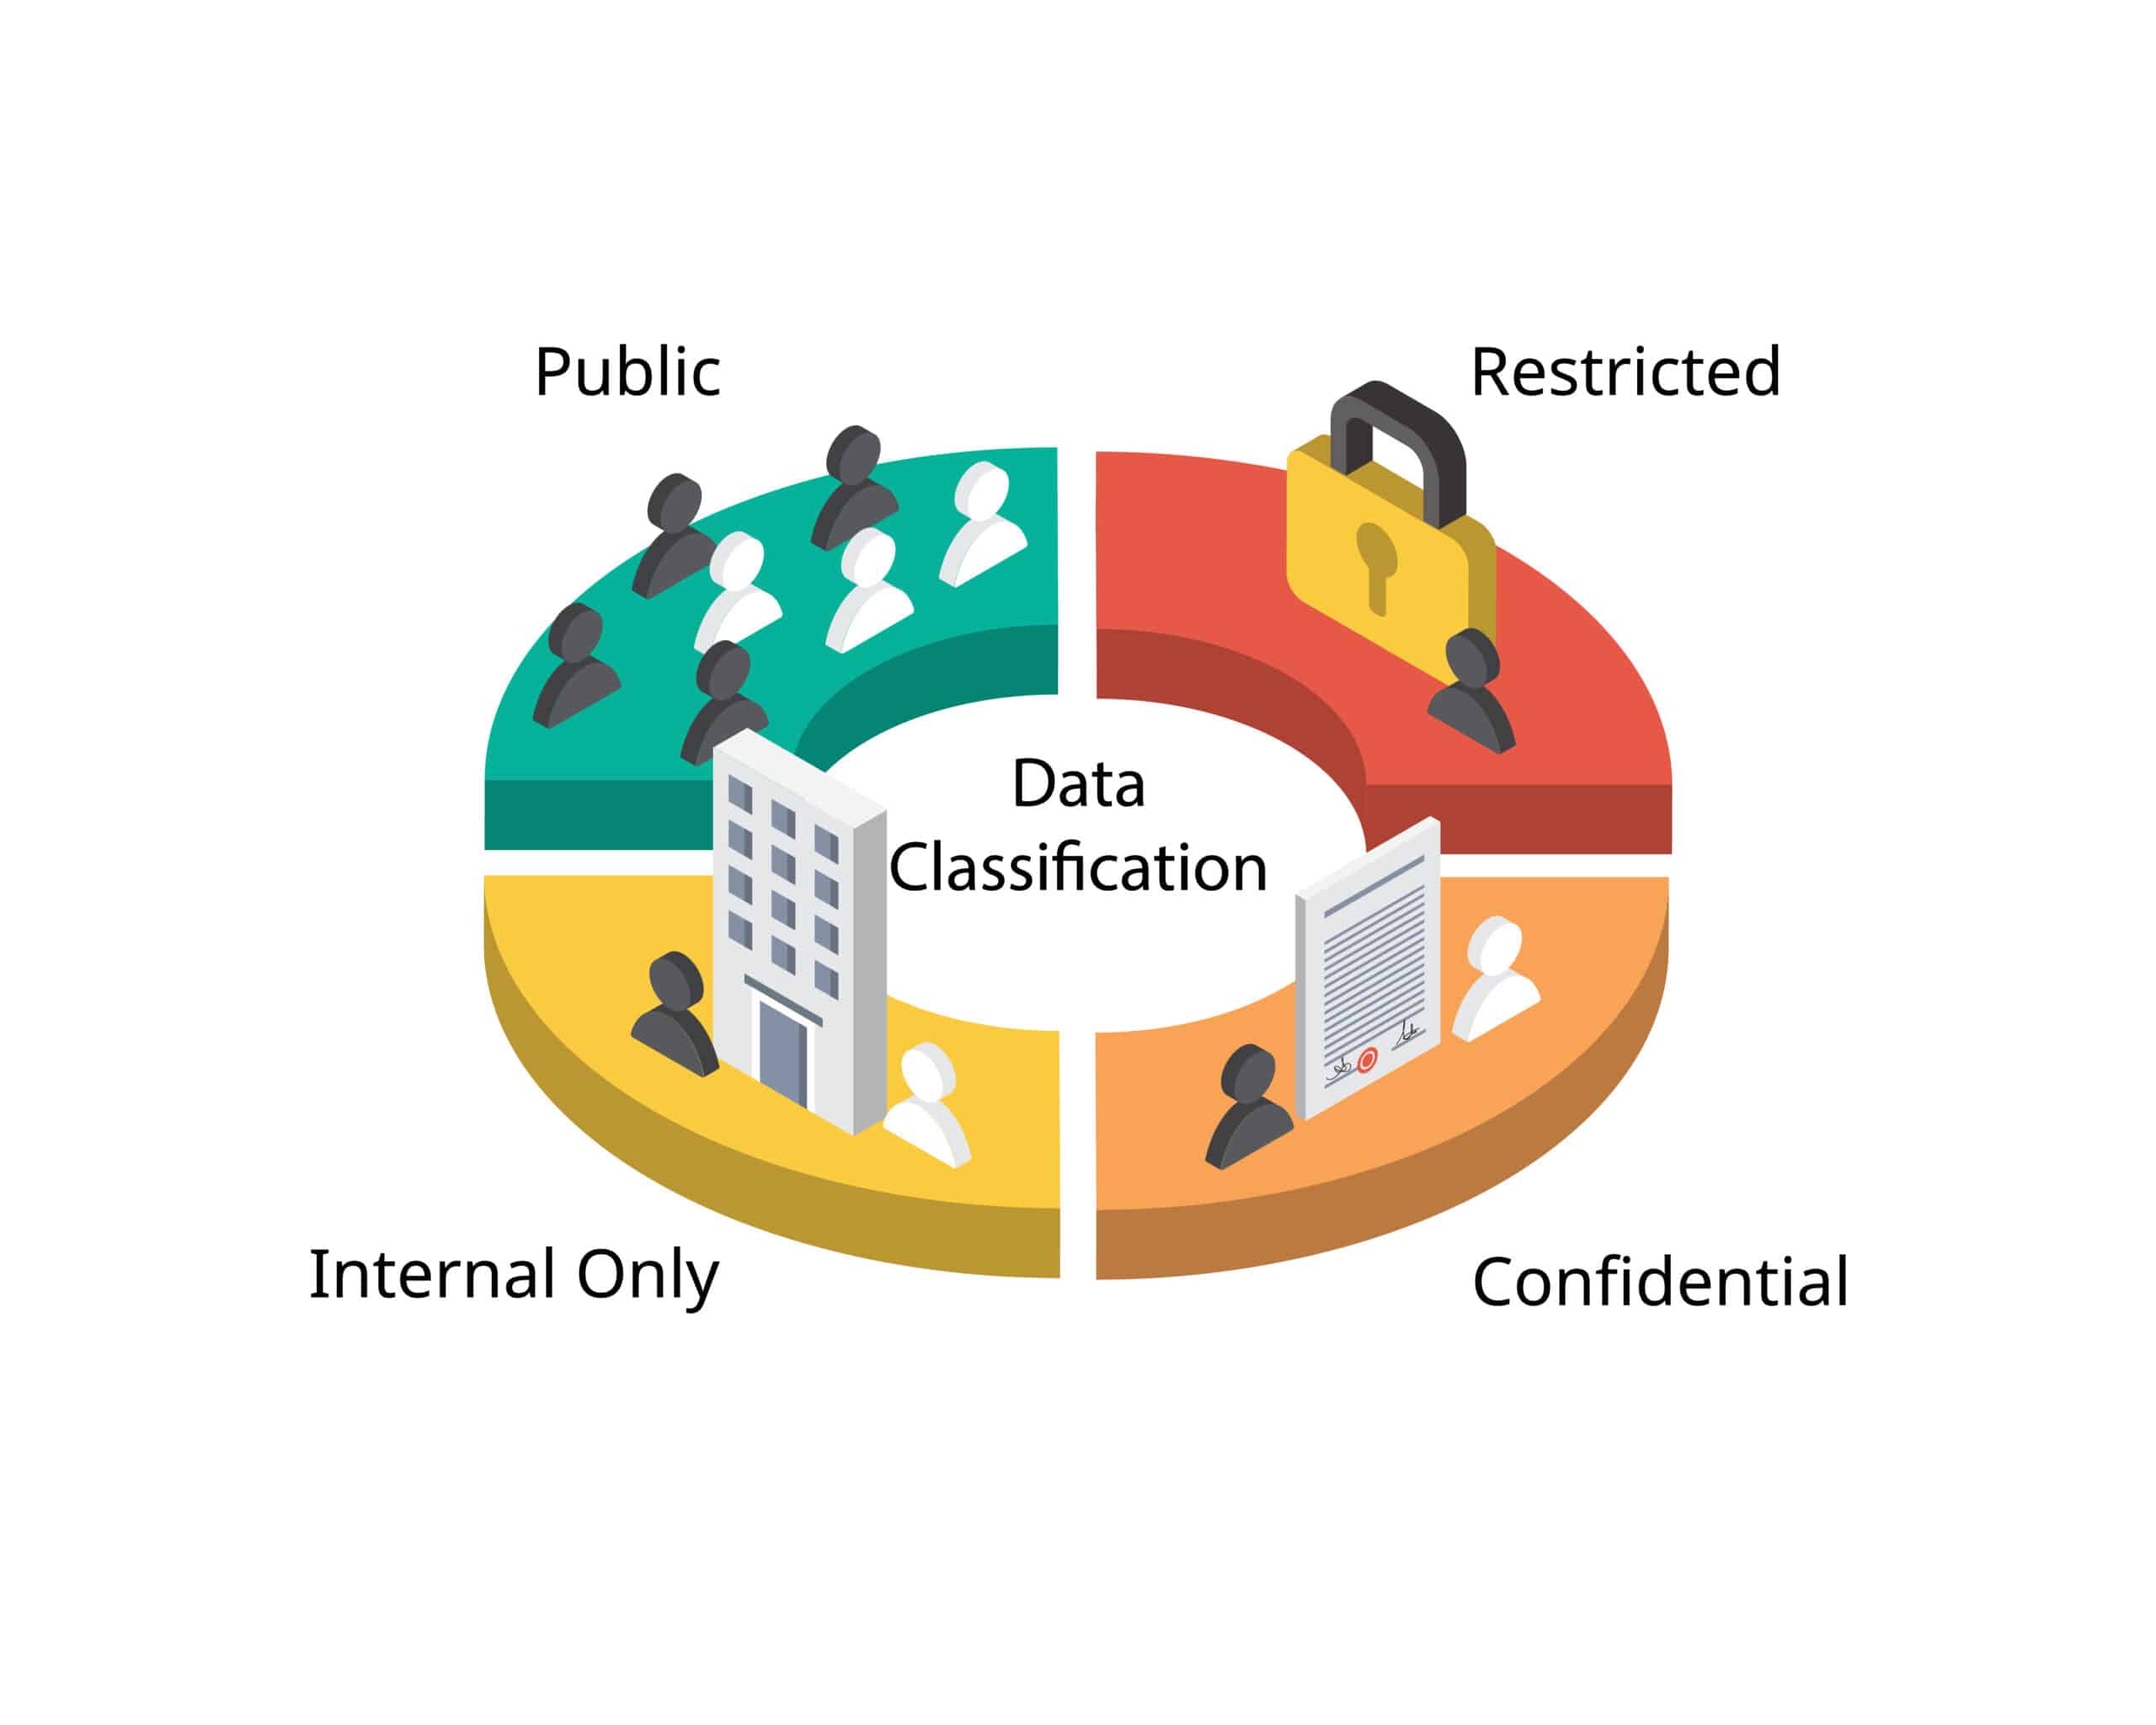
What is data classification?

Data classification is a critical aspect of data governance that focuses on categorizing data based on its sensitivity, as well as its significance to the organization. You use data classification to determine who can access which data and what level of security is allocated to each data type. 

Data classification simplifies data management by delineating security levels and access controls. This leads to more efficient use of data, as well as enhanced data security. When it comes to SOX compliance, robust data classification is key to ensuring financially impactful data is managed and used appropriately. Learn more about data classification in Salesforce.

Why do you need data classification?

The process of classifying data serves multiple purposes: 

  • It simplifies data management by clearly prescribing access controls.
  • It assigns the right security levels.
  • It ensures that each piece of data is handled appropriately.

Data forms the backbone of your organization, so understanding its nuances and significance is more important than ever before. At its core, data classification is all about bringing order and security to data by assigning each piece of data a sensitivity level that reflects its importance to the company. 

Why is data classification important for a SOX-compliant ALM process?

In the context of SOX compliance for ALM, implementing a robust data classification process is essential. The Sarbanes-Oxley Act—or SOX—emphasizes the importance of transparency and accountability for publicly-traded companies in their financial reporting. 

To adhere to regulations, it’s crucial to be able to distinguish clearly and quickly between financial and non-financial data. Data classification is instrumental in this respect. It promotes the clear separation of different types of data. That in turn helps you create a robust, SOX-compliant data governance framework that helps prevent noncompliance in the ALM process.

Abstract image of data replication representing sandbox management automation for Salesforce

13 Signs You Need Sandbox Management Automation for Salesforce

Solve These Problems—and More—With Automation for Salesforce Sandbox Management!

Without sandbox management automation for Salesforce, your release process is highly inefficient—and costly. In this blog, we list 13 signs you need automatic sandbox management. We also explain how it can empower your business and what benefits it offers.

13 Signs You Need Automatic Salesforce Sandbox Management

Abstract image of data replication representing sandbox management automation for Salesforce

Manual sandbox management—or worse, no environment management at all—can be the root of many problems throughout every level of your business. 

Developers keep overwriting each other’s work because they’re working in the same org. The sales team is frustrated because they have to wait too long for changes. And the executives are unhappy with the low performance and productivity.

Sound familiar? And this is just the tip of the iceberg. Check out these 13 signs you need sandbox management automation for Salesforce:

  1. Your C-suite is unhappy because the company isn’t achieving its goals. 
  2. Your sales team isn’t hitting its targets because you can’t deliver the changes they need on time.
  3. You’re spending too much time and resources on a slow, labor-intensive CPQ release process.
  4. You need another Full Copy, Partial Copy, or Developer Pro sandbox—but you can’t validate the expense.
  5. You regularly delay releases—or worse, miss deadlines altogether—due to an inefficient sandbox management strategy.
  6. You dread your weekly one-on-one meetings with your supervisor because your productivity isn’t up to speed.
  7. You never get enough done in a sprint because you waste too much time on non-development work like setting up sandboxes.
  8. You’ve lost count of the number of hours you’ve lost redoing work because another developer sharing the same sandbox overwrote your configurations.
  9. It’s time consuming and difficult to manage access to environments and mask data.
  10. The data in your development environment looks nothing like your production data, which causes issues further on in the release process.
  11. Your testing is subpar because you don’t have the time to create high-quality sample data for your test environments.
  12. You regularly fail to find bugs early in the release pipeline, making them much more expensive to fix later.
  13. You’re constantly having issues with conflict detection and resolution, which gets in the way of deployments.

Considering how much these problems are slowing you and the business down, wouldn’t you like to have a simple solution?

Empower Your Business With Sandbox Management Automation for Salesforce

With sandbox management automation for Salesforce, these issues are a thing of the past. For example, did you know sandbox management delivers direct cost savings?

How? Its sandbox seeding feature lets you turn Developer sandboxes and scratch orgs into production-grade environments! This eliminates the need to buy an additional Full Copy sandbox, Partial Copy sandbox, or Developer Pro sandbox.

Sandbox management automation also delivers indirect cost savings because it streamlines and accelerates the release process. It minimizes the time wasted on non-development work. And because you no longer have to wait on a sandbox refresh, it keeps your Salesforce team productive at all times.

In addition, Salesforce sandbox management automation enhances performance and productivity more than manual processes ever could. This helps drive revenue because it increases velocity significantly. 

Benefits of Automated Sandbox Management in Salesforce

Now you know how the big picture of how sandbox management empowers your business, check out how it solves your day-to-day headaches:

  1. Don’t waste your budget on an expensive Full Copy or Partial Copy sandbox. You can create the exact configurations you need in a lower-level org!
  2. Save time and money on setting up development environments, creating test records, and moving the sample data into the org. Are you a developer who uses Apex scripts to generate test data? Save time and energy on maintaining the scripts, because you don’t need them anymore.
  3. Increase the quality of the work by using data that’s identical to the data in your production environment.
  4. Enhance the quality of your testing with a shift-left approach by testing more frequently from the earliest stages of the development process. 
  5. Cut back on time and costs by catching bugs earlier on in the release process, when they’re easier and more affordable to fix. 
  6. Give everyone on the team their own development environment, and minimize the risk of losing work.
  7. Quickly and easily compare orgs to detect metadata differences. Solve any conflicts before they become an issue during deployment.
  8. Get more done in every sprint because you’re not wasting hours on non-development work.
  9. Meet all your deadlines because you minimize issues and bottlenecks.
  10. Empower your business users with the changes they need—when they need them.

The Best Sandbox Management Tool for Salesforce

Prodly Sandbox Management is the premier environment management solution on the market—and it’s powerful enough for Salesforce CPQ. You can automatically set up, compare, and sync environments in just a few clicks—all from a user-friendly, centralized UI. 

With sensitive data masking capabilities and full control over who can access each environment, you can easily ensure data security. Plus, with our diff view, you can compare the metadata differences between environments at a glance. This allows you to resolve any issues before deployment.

Our sandbox seeding automation provides instant data replication into up to five environments at the same time. And with our 1-click scratch org feature, you can set up production-grade environments—in a flash!

Subscribe to our blog—and be the first to hear about new developments!

FAQs

What is sandbox management in Salesforce?

Salesforce sandbox management is a set of processes you use to set up, manage, compare, and sync orgs to optimize the environments in your pipeline. When properly implemented, these processes enhance efficiency and reduce risk.

What is Salesforce sandbox management automation?

Automated sandbox management for Salesforce is software that eliminates the repetitive manual work involved with setting up, managing, comparing, and syncing environments. This state-of-the-art technology facilitates a faster, more reliable, and more secure release process—especially when combined with a DevOps approach.

The best data loader for Salesforce represented by neon arrows traveling at high speed

The Best Data Loader for Salesforce

The #1 Alternative to the Data Loader Download and the Data Loader CLI!

Are you looking for the best data loader for Salesforce? Watch this video to see that Prodly DevOps, the leading automated data loader for Salesforce, can save you hours of work and tons of frustration. Then read the blog to learn why Prodly DevOps is the fastest and best tool for loading data into Salesforce orgs.

Why Prodly Is the Fastest and Best Data Loader for Salesforce

As you saw in the video, Prodly DevOps provides an automated data loader that lets you effortlessly migrate data between orgs—with just a few clicks!

Prodly DevOps: Data Loading Made Easy

Prodly DevOps is the #1 data loader for Salesforce. It has an intuitive user interface that’s easy to navigate for everyone on your team, including admins, business users, release managers, developers, and architects. 

You can use it with either your production environment or a VCS as a source of truth. Moreover, because it doesn’t involve exporting any data to CSV files, it’s far more secure and reliable than manual data loading. 

On top of that, Prodly DevOps is 100 percent automated for the entire data schema. That means you only have to select the data set associated with what you want to move once. Prodly automatically moves all related objects for you—without you having to do a thing!

The best data loader for Salesforce represented by neon arrows traveling at high speed

Automated Dataloader Features

Prodly offers automatic duplicate resolution; reusable deployment plans; search, filter, and mass select; dependency management; data masking and partial deployments. It also provides the ability to schedule deployments. You can easily adjust it to each specific data migration on the fly without running into any issues that cause delays and missed deadlines. 

You never have to create or manage external ID fields, manually deactivate automations and validations, or use VLOOKUPs again.

In short—with Prodly DevOps, you can say goodbye to busy work, as well as hours spent resolving errors and maintaining CLI scripts. Instead, you breeze through every deployment in just a couple of minutes—without ever having to worry about data security or lost productivity!

Data Loader Can Cost Time and Resources

A manual dataloader isn’t particularly user friendly. It involves an often time-consuming, painstaking process. This is especially problematic when it comes to bulk data uploads and complex data models like Salesforce CPQ Price Rules and related objects. 

For admins, using Data Loader declaratively requires quite a few steps. You have to export the data from the source environment to a CSV, run VLOOKUps, map the IDs, and import the data into the destination org. The individual objects have to be loaded into the destination org one by one. And if you get an error, how do you know what you’ve mapped incorrectly—or how to fix it?

Depending on the volume and complexity of the data you’re working with, this manual process can take hours—or even days.

For developers using the Data Loader CLI, the most time-consuming aspect is that you have to maintain the CLI scripts to keep them up to date. If you don’t, you’ll likely run into issues that slow the development process down.

Final Thoughts on the Best Salesforce Data Loader

Because Data Loader is included with Salesforce, it’s an economical and viable solution when you’re migrating relatively small amounts of data without a lot of dependencies. 

However, when it comes to bigger jobs with more complex data models, you need a cost-effective, fast, secure, and user-friendly data loader—Prodly DevOps. Because with Prodly’s automated data loader, you can skyrocket your data migration process, increase your productivity, and enhance your velocity.

FAQs

What is an automated data loader?

An automated data loader is a tool that uses automation to migrate data between environments. It minimizes manual work and human error when you set up a development environment, sync environments, or promote data up the release pipeline. Learn more about automation for data loading.

What are the benefits of using an automated data loader?

Using an automated dataloader offers several distincts advantages. Pre-built templates drastically reduce the amount of time and effort required for migrating data between orgs. In addition, moving data with automation results in fewer errors, which further reduces the time involved with data loading in Salesforce. In short, using an automated data loader can significantly enhance your productivity and velocity.

Save money on Salesforce sandbox pricing represented by a VR image of a businessman and the words "cost control"

5 tips for saving money on Salesforce sandboxes

How to Save Money on Salesforce Sandboxes!

Salesforce sandbox pricing can be expensive, but there are ways to save on it. And that’s with a robust Salesforce sandbox management tool like Prodly.

In this blog, we discuss five ways you can drastically reduce your spend on Full Copy, Partial Copy, and Developer Pro sandboxes by using Prodly.

Save on Salesforce Sandbox Pricing With Prodly Sandbox Management

Save money on Salesforce sandbox pricing represented by a VR image of a businessman and the words "cost control"

Prodly Sandbox Management helps you save money on Salesforce sandbox pricing in the following five ways:

  1. Stop buying Full Copy, Partial Copy, and Dev Pro sandboxes to get development environments that look like production. You don’t have to spend five, 20, or 30 percent of your net spend on development orgs. With Prodly Sandbox Management, you can instantly replicate the exact part of prod required for development in lower-level orgs. Maximize every free developer and scratch org at your disposal by populating them with precisely the metadata and data you need. 
  2. Stop wasting time and money on non-development work. You don’t have to exhaust developer productivity on environment builds when you can’t afford Salesforce sandbox pricing for Full Copy, Partial Copy, or Dev Pro orgs. Nor do you have to spend hours generating data or deploying data and metadata between orgs to sync them. With Prodly Sandbox Management, you can use sandbox seeding to automatically create scratch orgs with instant data replication. Even better: You can do this in just a few clicks. Plus, you can effortlessly deploy data, metadata, and even complex data models between orgs. This gives you more time to focus on higher value work—and on getting that work done faster.
  3. Avoid issues late in the development process when they’re the most expensive to address. Eighty-five percent of bugs are introduced during development. And if you don’t catch them until later in the pipeline, they can end up costing 30 times more time and money to fix. Use Prodly Sandbox Management to replicate parts of your production org early in the development process. This results in fewer costly problems later on in the pipeline.
  4. Avoid potential loss of revenue resulting from downtime and errors. Don’t be limited by Salesforce sandbox refresh constraints that impact the quality of the data in your environments! Use Prodly to automatically sync orgs as often as you like to ensure consistency throughout your release pipeline—even on a schedule. This results in higher-quality changes, which minimizes bugs and downtime that can impact your end users.
  5. Avoid loss of productivity during sandbox refreshes. Salesforce sandbox refreshes can take a long time—and during this time, you can’t do any work in the org. Prodly Sandbox Management lets you effortlessly and quickly sync all your environments without having to do a refresh—so you can keep moving forward. And when refreshes are unavoidable, rest assured Prodly can help you lift and shift to another org—without missing a beat. 

Clearly, with Prodly environment management, you can minimize your spend on Salesforce sandbox subscriptions. You can also eliminate spend on activities that don’t add value and reduce the impact of bugs on the development process.

On top of that, you can maximize the uptime of your production org and keep your development team productive at all times. This  accelerates the delivery of new features—and empowers your end users.

So why waste your valuable budget on Salesforce sandbox pricing when you can save money with Prodly Sandbox Management?

FAQ

How much does a Full sandbox cost in Salesforce?

A Full Copy sandbox costs 30 percent of your net spend on your Salesforce license. For this money, you get a complete replica of your production org with all the customer data and metadata. 

Note that a Full sandbox is only an accurate copy for a very short period of time. As soon as any activity takes place in your production environment, the sandbox isn’t the exact same anymore. 

You can only bring it into a true duplicate state by refreshing it. However, you can only refresh a sandbox once every 29 days at most. That means the value of your Full Copy sandbox degrades gradually over the course of time until you refresh it. Then the same process starts over again.

Why do Salesforce sandboxes cost so much?

Sandbox prices in Salesforce can be steep. Of course, the value of Full sandboxes, as well as Partial sandboxes, lies in the fact that they provide you with an initially exact copy of all or part of your production org. 

Working in an environment that looks like prod is critical to the quality of your changes and the speed of your release management process. For this reason, companies are willing to pay a premium for these types of sandboxes. 

However, in the earlier stages of development, you don’t really need to replicate all of prod—just the sections required to perform the work you’re doing. That’s why Prodly offers sandbox management as an alternative to Full Copy, Partial Copy, and Developer Pro sandboxes. 

This option is much more affordable than dealing with Salesforce pricing. In addition, when used in conjunction with a solid sandbox management strategy, it enhances the velocity and quality of your change management process. Learn more about sandbox management.

The business case for automated sandbox seeding.

The Business Case for Automated Sandbox Seeding

Automated sandbox seeding can significantly accelerate digital transformation. It allows businesses to boost the pace of Salesforce innovation, save money on Full Copy sandboxes, improve governance and data security, and reduce attrition. Moreover, it empowers them to reduce the time to value of their Salesforce investment.

In this blog, we’ll take a closer look at the business benefits of automated data seeding.

The business case for automated sandbox seeding.

Accelerate the Pace of Salesforce Innovation Without Sacrificing Trust

Automated sandbox seeding results in a streamlined release pipeline, which enables faster innovation. Because it offers a less risk-prone alternative to making changes in the production environment, it drastically reduces the chances of errors, bugs, and downtime. This is critical to maintaining trust with business users. 

Save Money on Full Copy Sandboxes

With sandbox seeding, Salesforce teams can use Developer sandboxes or scratch orgs like Full Copies. Each Full Copy sandbox costs 30 percent of a business’s net spend in Salesforce. As such, organizations can save a significant amount of funds on change management.

Improve Governance and Data Security

Prodly Sandbox Management provides control over who can deploy what data to which environments. This improves governance. In addition, because sandbox management eliminates the need to download data to CSVs and enables the masking of sensitive data during deployment, it greatly enhances data security.

Reduce Attrition

According to a Salesforce survey, 89 percent of full-time workers are more satisfied thanks to automation. Moreover, an astounding 91 percent agree that automation saves them time and gives them a better work-life balance. When high-performing employees experience enhanced job satisfaction, it leads to improved retention. This greatly reduces the costs associated with acquiring and onboarding new talent and significantly contributes to an organization’s human capital.

Decrease Time to Value of Your Salesforce Investment

As a result of more efficient employees and faster, more streamlined release processes, Salesforce teams can increase productivity by 80 percent. As a result, they have more time to focus on value-adding work. Moreover, the business starts realizing the value of its Salesforce investment that much faster.

Prodly Sandbox Management

Prodly Sandbox Management is a powerful tool to manage all environments in the development landscape. Its one-click scratch org creation and sandbox seeding features drastically reduce the time Salesforce teams spend on setting up and syncing environments. Plus, its governance features ensure the business is always in compliance with regulations. 

As a result, Salesforce teams can work faster and compliantly, produce more and better work, and help propel the business forward.

For more information about Prodly Sandbox Management, please request a personalized demo

Screenshot of data masking in Prodly's sandbox seeding

7 Benefits of Sandbox Seeding in Salesforce

Here at Prodly, we know that data seeding in Salesforce is the beginning of any Salesforce DevOps process. Here are seven benefits of sandbox seeding that will help you maximize your ROI from Salesforce.

1. Selectively Update Full Copy and Partial Copy Sandboxes in Salesforce With Fresh Data and Metadata—on Your Own Time.

Full Copy and Partial Copy sandboxes quickly lose their value as the last QA or UAT stop on the release train. Why? Because your production environment keeps changing, so a Full or Partial Copy sandbox consistently becomes less of a reproduction.

Sandbox seeding in Salesforce lets you update your orgs piecemeal to keep them in sync with production. That way, you don’t have to overhaul each sandbox every time you want to refresh. 

With traditional Salesforce sandbox refresh requirements, refreshes are almost never convenient. The ability to do mini-refreshes significantly enhances your release process. As a result,  you can more effectively utilize higher-level environments to drive your release process. 


2. Move Faster—and Streamline Your Release Process

How often have you spent hours generating sample Account records and other Custom Object records one by one? Only to later run into problems because the data isn’t representative of your production environment?

With Prodly’s sandbox seeding, it’s easy to provision sandboxes in Salesforce. You can quickly select Objects to seed to up to five environments in one go. That means you can create five development-ready environments in just one click!

Selecting deployment data to seed to a sandbox with Prodly.

Prodly also provides prebuilt automation templates. They let you quickly seed an org with commonly-used Objects. And they even preserve complex data relationships in the process.

3. Unlock the Potential of Developer and DevPro Sandboxes in Salesforce, as Well as Scratch Orgs

Sandbox seeding lets you maximize your Developer and Developer Pro sandboxes, as well as your scratch orgs, as true development environments.

Your lower-level org should function as a ready-made playground. It’s an environment where you can can tinker with your ideas before pushing any changes up the release pipeline. If you start your projects with data seeding in Salesforce, you can sync configuration changes across all your sandboxes. 

And you’ll never again face get confused and frustrated about your test working in your DevPro sandbox—but not in UAT.

4. Use Developer Sandboxes Like Full Copies

You can work in your Developer sandbox with all the data you need to move forward. At the same time, your team can still perform work in your Full Copy sandbox. Think about it: Do you really need 100,000 Account records to test with? Or will 100 be more than enough for unit testing?

Imagine being able to quickly populate your sandbox in Salesforce with real test data and get to work. It’s one less roadblock to deal with. This helps resuscitate any lagging business processes. It also ensures you can get new features to end users faster. And isn’t that what it’s all about?

5. Quickly Create a Hotfix Environment With Sandbox Seeding

Sometimes you need to quickly fix a bug in Salesforce that’s affecting a mission-critical business process. Of course, you shouldn’t try to do this in production.

Instead, use data seeding to quickly spin up a sandbox in Salesforce and populate it with the data you need to fix the issue. Use best practices for making hotfixes in Salesforce, and simply promote the patch back to production

6. Enhance Employee Satisfaction

Employees are happier when they don’t keep running into issues that slow them down and cause headaches. 

In fact, according to a Salesforce survey, 89 percent of full-time workers are more satisfied thanks to automation. Moreover, an astounding 91 percent agree that automation saves them time and gives them a better Salesforce work-life balance. 

By offering employees an automated sandbox seeding process, you can make their day-to-day lives much easier. And that leads to improved job satisfaction.

7. Improve Productivity in Salesforce

With happier employees and faster, more streamlined release pipelines, you can increase productivity by as much as 80 percent. 

That means you have more time to take care of the day-to-day business of managing your business. Plus, you can take on more projects and work through them more efficiently.

Sandbox Seeding in Salesforce Is Critical to DevOps in Salesforce

The key principles of DevOps are ship often, ship small, build in isolated environments, and automate deployments. 

To build in isolated environments, you need to maximize reproducible environments—in other words, your sandboxes and scratch orgs. So it’s key to have automated sandbox seeding capabilities like those provided by Prodly Sandbox Management. 

Our sandbox seeding wizard lets you quickly and easily spin up mini environments that look like your production org. What’s more: They won’t affect other environments where the rest of your team is working.

Obstacles to Data Seeding in Salesforce

Sandbox seeding obviously offers many benefits—plus, it’s critical to Salesforce DevOps. So why aren’t more Salesforce customers doing it?

Some Salesforce customers aren’t yet aware of the power of sandbox seeding automation. They do know that manually populating sandboxes and scratch orgs with valuable testing data from production takes a long time. This is especially true if you run into issues when migrating relational data—which you probably will using legacy Salesforce tools.

And when a process becomes time consuming, it adds unnecessary expense to the project.

In addition, using Data Loader for seeding can cause concerns about security.  Downloading data to a CSV before migrating it to the new environment isn’t secure and may violate security policies.

Features of Prodly’s Automated Sandbox Seeding

Prodly Sandbox Management automates the process of seeding your sandboxes in Salesforce with real-life test data—making it quick and easy. Here’s are some of the solution’s most important features:

Data Templates

We provide prebuilt templates of commonly used record types that let you move entire relational data schema at once. Easily move your entire Sales Cloud, Service Cloud, Industries Cloud, or any other subset of your Salesforce schema. For example, migrate Accounts with all related Contacts, Opportunities, Quotes, and Cases with Case Comments and Attachments with a single click.

Screenshot of a diagram view of data template

Select Data on the Fly

For custom data seeding needs, Prodly Sandbox Management gives you a lightning-fast way to move Objects you want to seed. Simply select what you’re interested in, and the wizard automatically migrates the related data with it.

Data Masking

Sometimes, you have sensitive data you want to protect in lower-level orgs. Prodly Sandbox Management provides data masking to prevent unauthorized parties from seeing it. This helps ensure you’re in compliance with relevant privacy regulations and legislation.

Screenshot of data masking in Prodly's sandbox seeding

Ramp Up Your Release Management Process with Prodly

With Prodly to seed sandboxes in Salesforce orgs, you can minimize the upfront work on projects. In addition, you can ramp up your release management process. This one crucial step can give your team valuable hours back—and save your company significant resources. 

Perhaps you’re facing some flak for lagging returns. If so, consider sandbox seeding as a fundamental way to enhance your processes and get a stronger ROI from Salesforce. It’s a tool to keep your team agile and to improve time to value for the business.

Contact us to request a personalized demo!

An abstract representation of a hotfix.

Improve Your Salesforce Hotfix Strategy

Many devs and admins who follow governance and release best practices find making a Salesforce hotfix challenging.  If you struggle to configure and deploy hotfixes in a timely manner, you’re not alone. And when it comes to creating a hotfix environment in Salesforce, traditional data set building is slow, laborious, and prone to error—even with Data Loader.

But as Victoria Livschitz said, “It’s not the prevention of bugs but the recovery—the ability to gracefully exterminate them—that counts.” 

And that’s exactly what Prodly allows you to do. 

Prodly lets you automate your hotfix strategy and rapidly fix, test, and promote essential changes to production. In this blog post, we’ll examine what hotfixes are, how not to handle them, and four ways Prodly improves your hotfix strategy.

What Is a Salesforce Hotfix?

In Salesforce, a hotfix is a simple configuration change that addresses a key issue impacting day to day business. Oftentimes, one is required due to a bug a user reports—so you need to fix it immediately.

Although a hotfix may not involve a major change to your production environment, it’s business critical and therefore urgent. Because it addresses a bug that’s adversely affecting your business operations, it can’t be postponed until your next major release.

That’s why you need the ability to implement a patch as efficiently as possible without getting bogged down in error-prone manual processes.

Salesforce Hotfix Workflow: Inefficient and Costly

If you’re implementing a hotfix in Salesforce, the process probably looks something like this:

  1. Purchase a Partial Copy sandbox or Full Copy sandbox to use as a hotfix environment—at 20 percent or 30 percent of net spend.
  2. In this environment, determine what’s causing the issue. Then fix the issue and test it.
  3. Use change sets to promote the approved change to your production org. That involves creating an outbound change set in the hotfix environment and an inbound change set in the prod org. Then you have to validate the inbound change set and deploy the change set. 
  4. Migrate (either manually or with Data Loader) any configuration data required for the hotfix.
  5. Use change sets to promote the change to your Developer sandboxes and the Full sandbox you use for training.

Unfortunately, this strategy can be cost-prohibitive due to the expense of purchasing a sandbox to use as a dedicated hotfix environment. Moreover, the multiple manual steps required for each change set deployment make this process highly labor intensive and time consuming. 

Never Make a Patch Directly in Production!

Knowing how expensive and inefficient it is to implement a hotfix in Salesforce, you might be tempted to rush things and make the hotfix directly in production. 

A word to the wise, however:

Never, ever, make a hotfix directly in your prod org!

Why? Because if the hotfix introduces any new issues, you’ll be stuck with a much bigger headache. And that could affect your CX even more!

Create a Prod Hotfix Strategy Before the Next Bug

To be prepared to make a mission-critical change in a timely manner, don’t wait until a serious issue arises to design a hotfix workflow. Instead, get ahead of things and establish a production hotfix strategy before the next bug occurs. Your strategy should:

  • Appoint team members to configure the hotfix
  • Designate an environment where you’ll make the change and test the fix
  • Specify how you’ll promote the fix into production
  • Determine which other orgs will need the fix and how you’ll back promote the fix
  • Include a post mortem to analyze the event and prevent future issues

4 Ways Prodly Can Improve Your Hotfix Strategy

Now you have a basic game plan for dealing with hotfixes, let’s take a look at how Prodly can improve your strategy.

1. Use a Free Environment for Dedicated Production Support

With Prodly Sandbox Management, you don’t need to purchase a new Partial Copy or Full Copy sandbox as a dedicated hotfix environment. You can simply use a free Developer sandbox or Scratch org, because Prodly lets you easily and quickly move data into it. This saves your Partial Copy and Full Copy sandboxes for higher value projects in Salesforce.

2. Seed the Impacted Configuration to Your Hotfix Environment 

Your hotfix environment needs to be a reproduction of your production org. However, you don’t have time to recreate all the data from the prod org in the sandbox. 

In Prodly, you can compare your orgs to see any metadata differences between your prod org and your hotfix environment. If there are differences that will impact the patch, you can easily review and sync them to your hotfix environment. 

You can use sandbox seeding to automatically migrate the affected data to the hotfix environment. The sandbox seeding wizard allows you to quickly select data and upsert it to your hotfix environment.

Simply select a root object in your prod org, along with any related objects. Next, temporarily deactivate all events for the duration of the deployment to avoid complications. Finally, implement the deployment.

Note that Prodly provides prebuilt templates for common data seeding needs that can save you even more time.

3. Promote the Hotfix Back to Production

With your hotfix environment set up, you can determine what the problem is, configure the required change, and test the change without any risk to your prod org. Once you’re satisfied the change works, Prodly makes it easy to seamlessly move the change back into your production org—regardless of whether the fix involves metadata or data.

You also don’t have to use change sets and Data Loader to manually push the change to your prod org. You can leverage Prodly to automatically migrate the metadata and data while still maintaining complex object relationships. Simply select the configurations you want to deploy, and then deploy all the metadata and data changes at once.

4. Sync the Salesforce Hotfix to the Rest of the Orgs in Your Stack

While you’ve been rushing to fix the bug, your teammates may have been working on the next release. It’s essential to sync the rest of the orgs in the release path with your production org and training environment so they don’t reintroduce the bug or cause new ones. 

Prodly allows you to sync data to up to five orgs simultaneously. So once you’ve promoted the patch back to production, you can quickly and easily sync the metadata and data changes from production to the other orgs in the stack. The benefit is that by doing this, you’ll bring your other sandboxes up to date without having to wait to refresh them

An abstract representation of a hotfix.

Salesforce Hotfixes Are Easy With Prodly

Let’s face it: Bugs happen. 

And when they impact your day-to-day business operations, you need to fix them—fast. With a robust hotfix strategy and Prodly, you can quickly, efficiently, and easily create a hotfix environment, fix the issue, and promote the change to your production environment and other orgs. And you can do all this without the high costs of purchasing an additional Partial Copy or Full Copy sandbox in Salesforce.


To learn more about Prodly DevOps, contact us today.

The Value of Bidirectional Sandbox Seeding

In this blog, we explore what bidirectional sandbox seeding is and why you need it. We also look at the value of sandbox seeding with Prodly Sandbox Management, as well as why you should be seeding sandboxes in the first place.

What Is Bidirectional Sandbox Seeding?

Bidirectional sandbox seeding involves deploying data from your production org to a sandbox—and from your sandbox to another environment. You can do this with a freshly created org or during an environment refresh.

A photo of a desert with a traffic sign with arrows pointing in opposite directions representing bidirectional sandbox seeding

Why Do You Need Bidirectional Sandbox Seeding?

Bidirectional sandbox seeding allows you to create a fresh sandbox, deploy data to it, and then move data in any direction—up, down, and laterally. You can roll back changes to start all the way at the beginning, or you can change just one tiny detail. 

This makes for a much better auditability of changes in production and deployment results, resulting in better governance.

When you’re only able to work with partial data, the chance of bugs and errors slowing down your progress is immense. Many teams lose steam in the development and QA process when they go the route of manually working with a sandbox test data set. 

In contrast, bidirectional sandbox seeding gives control to anyone who can click through a data management workflow. 

The Value of Bidirectional Sandbox Seeding With Prodly

With the sandbox seeding feature in Prodly Sandbox Management, you have the ability to move data in both directions—with just a few clicks. This allows you to maximize your team’s efficiency, transform your entire workflow, and improve your end-user experience. 

By using this low-code option for DevOps, you’ll soon be handling change requests like clockwork. 

Improve Your Governance Strategy With Prodly

The seamless, automated process for seeding sandboxes Prodly provides enhances your governance strategy

It increases org health, fights errors, and improves efficiency tremendously. Here’s how:

Prodly Sandbox Management can help you move your data up, down, backward and forward between your production org and sandboxes. 

It gives you the power to migrate data from up to five orgs simultaneously. This eliminates the need to depend on a Full Copy sandbox to work from as you advance through changes. 

You can also configure data simulations, meaning that you can make changes without consequences. When you need to deploy complex data from a schema all at once, you don’t have to worry about complications anymore. 

Sandbox Seeding Without Prodly

Without the sandbox seeding feature in Prodly Sandbox Management, you’re literally left to your own devices having to use a barrage of tools to handle what Prodly does seamlessly. 

There’s the tedious process of using a data loader. The difficulty, duration, and mind-numbingness of the project can be compounded based on the size of your project. 

Some companies employ a third-party developer to manage their sandbox, which can become quite costly. 

In contrast, with Prodly, you can populate—and even anonymize— representative test data into as many as five orgs in just a matter of minutes. Prodly gives you more control of your data and processes, as well as a greater probability of aligning your team with the needs of your stakeholders for every project. 

Why Should I Seed Sandboxes?

There are several very good reasons to seed sandboxes. 

Without sandbox seeding, there’s a lack of representative production data in lower-level sandboxes that makes it harder to imagine, configure, and test changes. 

This problem becomes more complicated as changes move up the release pipeline and you need to keep all of the sandboxes in sync with production.  

However, sandbox seeding lets you provide everyone with their own development environment before they promote their changes to a shared QA org and ultimately production. This circumvents the problem of who’s doing what in a shared sandbox—plus, it reduces the odds of overwriting each other’s work.

It lets your team work faster and test more thoroughly. It also gives you more effective use of your expensive sandboxes.

In addition, when everyone has their own development environment with representative data, it’s much easier to find a good window of time to refresh your Full Copy or Partial Copy sandbox. And that in turn reduces the number of errors you encounter during the development process.

See Bidirectional Sandbox Seeding in Action!

Discover how easy and quick it is to seed sandboxes with Prodly Sandbox Management—watch the 25-minute webinar Ask a CSM: Bidirectional Sandbox Seeding.

A red arrow and a white arrow coming together and merging, representing a Salesforce org merge

Everything You Need to Know About Salesforce Org Merges

Salesforce org merges are complicated but often necessary processes that involve combining one or more production instances of Salesforce. In this blog, we discuss everything you need to know about them, including what they are, what they involve, and four reasons to merge Salesforce orgs. We’ll also list what information to gather before a Salesforce org consolidation, how to prepare for a merge, and we’ll discuss how to merge Salesforce instances.

What Are Salesforce Org Merges?

A red arrow and a white arrow coming together and merging, representing a Salesforce org merge

A Salesforce org merge or org consolidation occurs when a company decides to consolidate two or more instances of their Salesforce CRM. You combine the integration of the various technological backends of these orgs into a new whole. 

Oftentimes, these orgs are highly customized, with thousands of users, a significant amount of process automation, custom objects, Visualforce pages, Apex code, third-party apps, and more. Because of this, you have to sort through everything carefully to see what’s necessary and you need to keep, what you can improve, and what you no longer need.

What Does a Salesforce Org Merge Involve?

On the surface it sounds simple, but in reality, performing an org merge in Salesforce is highly complex. To do it correctly and to the benefit of your business, you have to decide how to merge two orgs with different processes, objects, fields, data, access levels, and so on.

An org merge tends to be a period of deep reflection and reevaluation of how you’ll leverage Salesforce to support the business’s growth going forward. 

Typically, you select one of the orgs as the surviving org. However, you might choose to combine multiple production instances of Salesforce into a new org. 

Either way, parts of the legacy org often survive the process. Perhaps the legacy org had a better solution for a shared business process or solved an issue that the surviving org never encountered. That’s why you need to merge any data you want to keep from the legacy org into the surviving org.

4 Reasons to Merge Salesforce Orgs

Because org merges are so involved, companies usually only perform them for four reasons: During a corporate acquisition, to reduce technical debt, to eliminate silos between teams, and to manage costs.

1. Corporate Acquisition Org Merge

A corporate acquisition is the most common reason for performing an org merge. When one company acquires another and they both use Salesforce as their CRM, they need to integrate their systems to fully integrate the company.

After the merge, there can only be one source of truth. That’s why you designate one Salesforce production instance as the surviving org.

2. Reduce Technical Debt

Another reason for merging Salesforce orgs is to reduce accumulated technical debt. Business changes rapidly, and decisions, processes, and workarounds that made sense last year might now be obsolete. When you perform an org merge, you can select what to keep, and what to discard.

In fact, companies that have accumulated significant Salesforce tech debt after years—or even decades—of using Salesforce may find it easier to start over fresh in a brand new org than try to unwind legacy processes. In this case, they save specific processes, optimize them, and move them to the new org. This is called the Greenfield approach.

3. Eliminate Silos Between Teams

At the same time, you might have originally had valid reasons for separate business units to operate in their own individual Salesforce orgs. However, today, it could be inhibiting greater collaboration.

4. Manage Costs

An org consolidation allows you to run your business more efficiently, because you can assign tasks across groups, run consolidated reports, and have one org as the single source of truth. You can also save money on duplicate license costs for any users who need access to both original orgs; plus, you have lower costs for setting up and managing the same or similar fields or processes in both instances. 

This is ultimately a considerable cost saver. Learn more on saving on Salesforce sandbox spend. 

Information to Gather for a Salesforce Org Consolidation

As we’ve discussed, a Salesforce org merge is a considerable undertaking. That’s why it’s wise to be as organized as possible before you begin. And good organization starts with information gathering. Answer the following questions:

  • What do you hope to gain from the org consolidation?
  • How many orgs do you need to merge? What are the editions of each?
  • Do the orgs have a Classic or Lightning Experience UI?
  • How many licenses are there in each org, and what types are they?
  • Will you add to or subtract from the current number and types of licenses?
  • Which third-party applications are currently installed in each org? What are their expiration or renewal dates? Which ones will you continue to use?
  • Do you have a predetermined surviving org?
  • Does the new org have sufficient file and data storage?
  • Which data are you consolidating? All of it, or only specific records and objects?
  • What duplicate content do you need to take into account?
  • What automations and integrations are in place in either org?
  • Will you need to provide training for users post merge?
  • Do you want to preserve change histories and stage histories?
  • How will you handle private views, dashboards, and reports?
  • Do you need to preserve system audit fields?
  • If there are inactive users, how do you want to handle them?
  • Do you need to update sharing rules for the surviving org?
  • Do you need to deploy special features like multi currency, multi language, or territory management?
  • What is your timeline for the project?
  • Do you have the resources in place to handle this merge project?

How to Merge Orgs in Salesforce

Each org merge project is unique and will have specific criteria for success, but the overall process is the same. Whether you complete the consolidation yourself or hire a consultant to do it, here’s how to merge orgs in Salesforce.

1. Prepare for the Org Consolidation

A. Create a Plan

Start by putting a plan in place, along with a realistic timeline. To determine your timeline, consider both your company’s needs, as well as license expiration dates. 

It can also be useful to establish a Salesforce Center of Excellence to lead the initiative.

B. Build Your Team

Org consolidation is not a one-person job. It’s critical to engage your stakeholders early in the process. In addition, make sure that each team that will be impacted by the org is represented. 

On the technical side, you’re going to need someone who understands the data structure of both orgs. This person should be able to make recommendations on the best way to map the data from the legacy org to the surviving org.

C. Assess What Systems the Merge Will Impact

Make a list of the systems the consolidation will impact. This will include your core Salesforce Clouds, as well as:

  • Additional Salesforce Products (Pardot, Field Service, etc.)
  • Custom objects
  • Apps from the AppExchange
  • Integrations to systems outside Salesforce (ERP, sales engagement, advertising platforms, web-to-lead/case forms, etc.)

D. Document Requirements

With all the information from the previous section  at your fingertips, it’s time to list out the requirements for the org merge. Think also about things such as the length of time you’ll need to store data from the legacy org that you’re not consolidating, how processes will change, and what your testing plan is.

E. Create an Org Merge Strategy

You absolutely need a strategy to effectively complete the consolidation. Due to their complexity, org merges take time and multiple sprints. However, that doesn’t mean all work in production grinds to a halt.


Determine which sandbox to use for staging the org merge before deploying it to production. How will you keep the staging environment current with changes and hotfixes in prod? Do you have an easy, repeatable way to seed the sandbox with data (and possibly even metadata) without having to do a refresh that overwrites the org merge work in progress?

2. Build Your ETL Logic

ETL (extract, transform, load) is the process of taking data out of one system, cleansing it, and moving it into a new system. Mapping out your ETL logic is the key to a seamless org merge, so make sure to allocate this step the time and attention it deserves.

A. Map Objects Between the Two Orgs

Start by mapping objects between the surviving org and legacy org. Which objects do both orgs have in common? Which legacy objects will need to be mapped to existing objects in the surviving org? Will new objects need to be created in the surviving org so you don’t lose data?

Also, consider which objects should use audit fields for accurate reporting. For instance, if you’re not careful with Opportunities, you could make it appear that you created and closed the legacy Opportunities on the same day. This would completely invalidate your average sales cycle.

B. Check Field-Level Mapping

Now you’ve mapped the objects, it’s time to think about field-level mapping. Now the objects match, do their fields? 

If not, is the data needed in the surviving org? If so, should the field be mapped to an existing field or recreated in the surviving org?

Pay attention to picklist values and any data standardization in the surviving org. Loading incorrect formats or values will impact reporting, validation rules, and general user experience. 

For example, let’s say the surviving org uses Enterprise Territory Management to assign territories based on a two-letter state or province code. In this case, the legacy values should be transformed before loading, otherwise the legacy accounts won’t be assigned correctly in the surviving org. 

3. Execute the Org Merge

With all the preparations complete, it’s time to perform the actual merge process. Remember: You’ll need to keep the legacy org operational until you’re ready to fully transition users to the surviving org. This means you’ll have to run through the org merge steps multiple times to make sure you’ve caught all new and updated records.

A. Steps for Executing an Org Merge in Salesforce

Perform the following steps to carry out the org consolidation process:

  1. Provision a sandbox from your surviving org, seeding any data from the surviving org if needed.
  2. Configure any new objects, fields, and apps that you need in the surviving org.
  3. Extract and load your legacy data into the sandbox, transforming it per your ETL logic.
  4. Test, test, test! This should include unit testing and UAT in the sandbox. 
  5. Train users on any changes to processes.
  6. Deploy your metadata changes and records to production. 
  7. Review all deployments. Remedy any errors, and redeploy if necessary.

Congratulations! You have successfully completed the org merge!

A Final Word

Keep in mind that the type of integration needed and your stakeholders’ requirements will dictate when you can start making changes. The earlier you can transition integrations that create or update records, the fewer times you’ll have to run through the org merge process. 

However, this isn’t always possible. For instance, you can’t update your legacy web-to-case forms until you have users who can resolve customer issues actively working in the surviving org. 

Prodly DevOps can help seed your sandbox, as well as automate the entire work migration process quickly and compliantly during an org merge. Check out our FREE on-demand webinar, Easier Org Merges, to see how we can help you prepare and perform your next org merge. 

FAQs

What is a Salesforce org?

A Salesforce org is a dedicated instance of the Salesforce platform where you store and manage your organization’s data, configurations, and customizations. Each org has its own set of users, data, and security settings and can be customized with various apps, objects, fields, workflows, and integrations.


How does a Salesforce org merge reduce technical debt?

When you consolidate two or more Salesforce orgs, you can significantly reduce technical debt by consolidating data, reducing the number of customized components you need to maintain, and minimizing the number of apps and integrations you need for your surviving org to function optimally. Learn more about technical debt in Salesforce.

Sand dunes representing populating sandboxes with data

How to Populate Salesforce Sandboxes With Data

Providing every developer and admin on your team with their own sandbox for their Salesforce development is an essential aspect of DevOps. To prepare those build and testing environments at the beginning of a project, you need to copy data to them from your production org. In this blog, we’ll discuss 5 ways to populate your salesforce sandboxes with data.

Perform a Salesforce Sandbox Refresh

To get the most current test data in your org, perform a sandbox refresh. This will refresh it with data from your production org. 

Time Limits for Refreshing Salesforce Sandboxes

You can refresh a Full sandbox once every 29 days with metadata and data from production. If you delete a Full Copy, you have to wait until the 29 days are over before you can create a new one.

The refresh interval for a Partial Copy is once every five days. This updates your sandbox with data and metadata from production. Again, if you delete it, you have to wait until the five days are over before you can replace it.

In Salesforce, refresh Developer orgs or Developer Pro sandboxes once a day. Note that this only updates the metadata. You’ll need to seed data into the orgs yourself.


How to Refresh a Sandbox in Salesforce

Begin by selecting the sandbox you want to refresh in your list of sandboxes in Salesforce. Click “Refresh,” and review—and if needed, edit—the Name, Description, and Create From values.

Select the type of environment you want. Refer to the table to see the number and type of sandbox licenses in your org. 

Select the data you want to copy. If you’re refreshing a Full Copy, click “Next,” and determine how much of the existing object data you want to copy.

If you’re refreshing a Partial Copy sandbox, click “Next,” and choose a template that determines the data you’re copying. 

You can activate your sandbox immediately after refreshing it by clicking “Auto Activate.”

Clone a Sandbox

If you simply want to recreate an org you’re already using, you can clone it. All its metadata and data will be copied to the new sandbox.

Because the cloned sandbox uses the same license type as the source org, you need to make sure you have that type of license available. 

Use Data Loader and Excel

Data Loader is the native Salesforce data migration tool you can use to seed orgs. You can leverage it to export, insert, update, and delete Salesforce records using the user interface or, if you have Windows, the command line. 

First, prepare the data you want to export from production into your sandbox. Specify the configuration parameters to determine the scope of the data migration. Select the Excel files Data Loader will use to first export the data from production and then into the destination org. Finally, make sure that your field names in the import file correspond exactly to the field names in Salesforce. 

Note that most people find Data Loader to be frustratingly time-consuming, labor-intensive, and prone to error. 

Create a Custom ETL Script

If you’re a developer, you can use an extract, transform, and load script to seed a sandbox in Salesforce. An ETL script might not be the first solution you think of to seed a sandbox, but it can be effective, nonetheless.

The benefits of writing your own script are that you’re not limited by refresh intervals. Nor do you have to use Data Loader. But you do have to invest the time to initially write the script—and then maintain it. 

Use an Automated Data Migration Tool

Use an automated data migration tool from the AppExchange—like Prodly Sandbox Management—to quickly and easily populate sandboxes with data. 

An automated data migration tool has the benefit of minimizing the manual steps involved in the process. On top of that, automation eliminates human error, which prevents frustrating mistakes and do-overs. And like ETL tools, using an automated data migration tool lets you bypass refresh intervals. In short, it’s the easiest, fastest way to prepare your build and test environments for development work.

Leverage Automated Data Migration for CPQ Configuration Data

When using configuration data in apps like Salesforce CPQ, you’ll want to promote changes back up the release chain, as well. In Salesforce, copy data from one sandbox to another further along in the release pipeline with an automated solution. This saves time and prevents errors with migration work and provides you with more time and resources for testing and problem solving. 

Discover the Ease of Prodly Sandbox Management

Prodly Sandbox Management lets you populate up to five sandboxes from production—or any other org—with just a few clicks. Contact us to request a personalized demo